Get an Organization Upgrade With A Thrifty DIY Cube Storage Hack
You don’t have to spend a ton of money for furniture that is both functional and stylish. Since I bought my new house, I’ve been obsessed with scrolling pictures of furniture updates and cube storage hacks that take the ” good bones” of inexpensive furniture and turn it into something that super posh. One popular item that people are constantly reimagining is the cube storage shelf. This cube storage hack is both affordable and extremely practical.
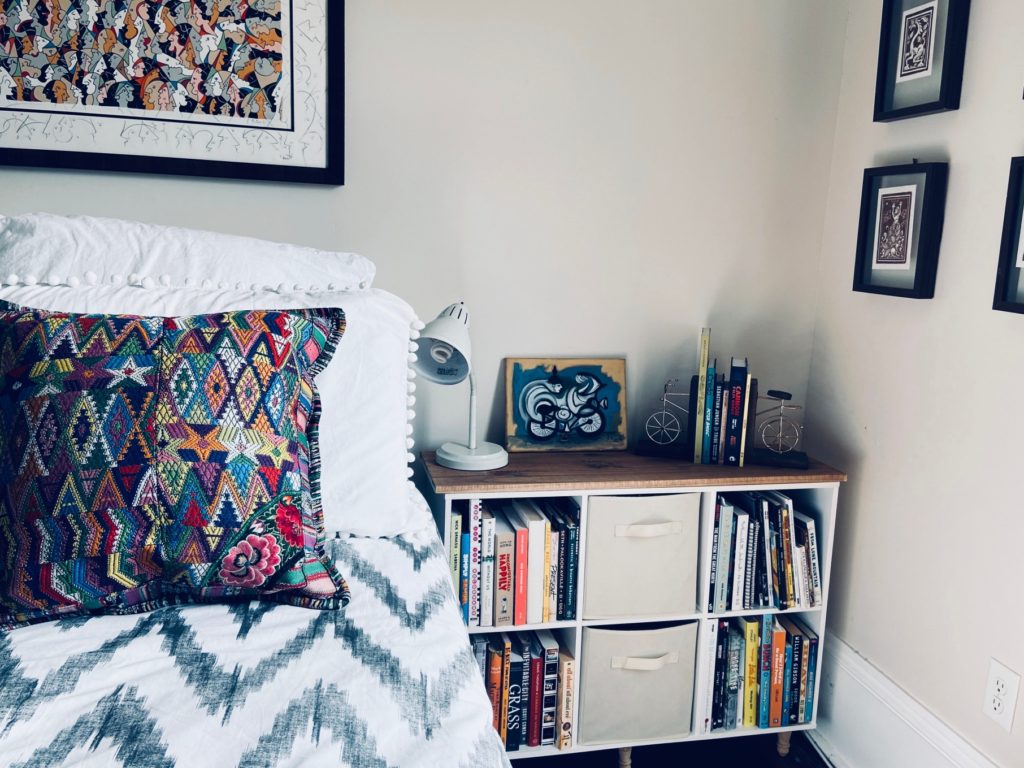
Recently, I noticed a growing clutter problem in the bedroom that I share with an avid reader who is often reading 3-4 books at one time. This is great, except when it starts to spill over onto the floor. I decided it was time to replace our plain 4 Cube Storage organizer with a larger 6 cube organizer to better accommodate the overflow of books.

I went to Lowes and picked up a this 2×3 cube storage unit. The one I got was by ClosetMaid and cost about $36. These storage cubes are also readily available in other places such as Target, Home Depot, and Amazon.
When we switched the units out, I noticed a problem. The old unit was made up of 13×13 cubes and the new unit is made up of 11×11 cubes. Even though the new unit was technically bigger and could hold more books, it was much shorter and looked way too small in the space.
I decided it was going to need a bit of DIY love. So I headed back to Lowes for a few more supplies to complete a full cube storage hack.

What You’ll Need:
In addition to the cube storage unit, you will need:
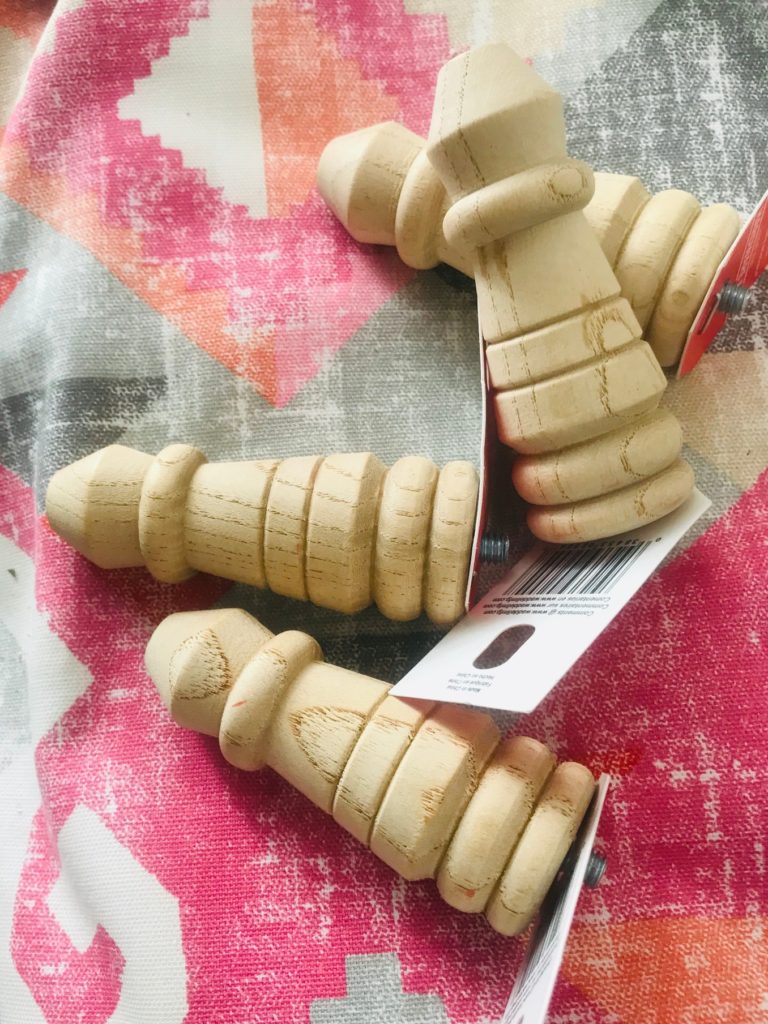
- 6 four inch legs . I used these but these would also work nicely
- 6 furniture leg mounting plates
- Wood stain
- A wooden board that fits the top of the cube storage
- A saw (only if you need to cut the wood board down. Mine fit perfectly)
Assembly | Cube Storage Hack
First, assemble the storage unit based on the instructions that are included. Next, determine where the bottom of the storage unit will be. If you are going to lay it horizontally like I did, you’re going to want six legs. Since the unit is built for laying flat on the floor, adding legs means you’re going to want extra supports in the middle.
Using a measuring tape and a pencil, mark out even spaces where the 6 leg plates will go. I placed one in each corner and 2 in the center front and back of the unit.
Add On | Cube Storage Hack
Once you have your markings, drill in the plates and then screw the feet securely into each plate. You can use the wood stain on the legs to match the top.
Turn the unit over onto it’s feet and measure it’s width. If you need to cut down your board, measure and mark the cut line with a pencil. You can use a hand saw or jigsaw to cut but I really love my miter saw. It makes getting straight lines super easy and fast. I’ve said this before but, If you’re doing a lot of woodworking projects, highly suggest in investing in a miter saw.
After you have cut your board to size, stain it and let it dry completely. I used this wood stain in a cherry color.
Once your board m is dry, secure it to the top of the unit using one screw in each corner. Drill from the inside so the screws are not visible.
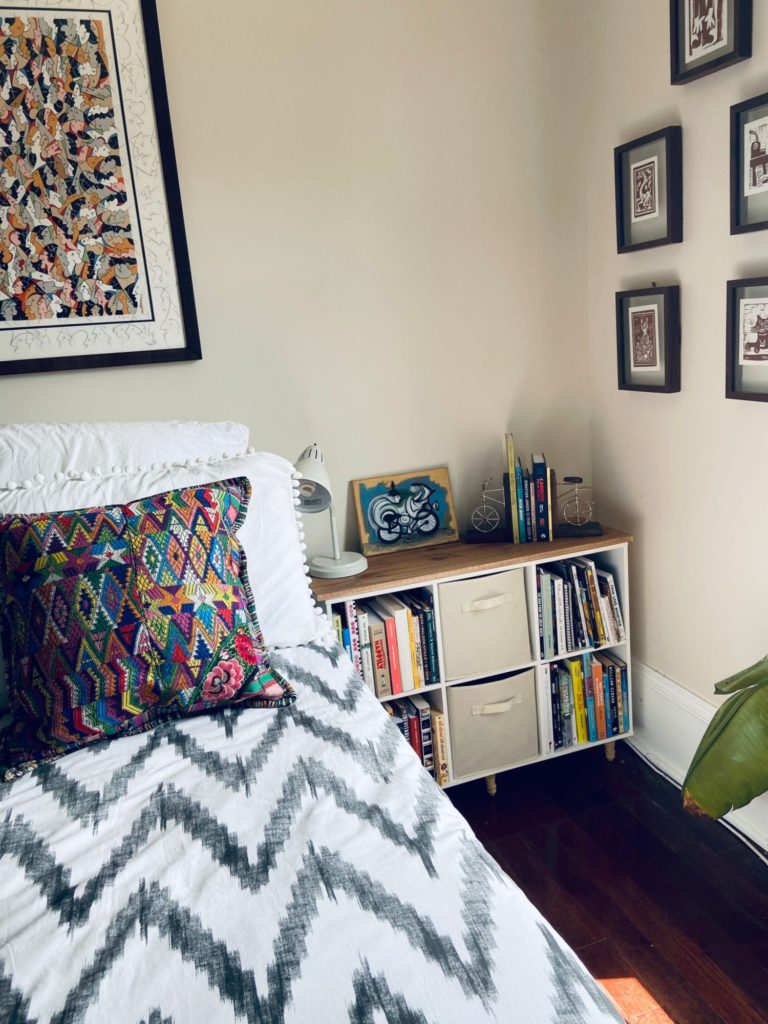
Now your storage unit is ready to be filled with all of your books or anything else you want to keep organized.

I love how organized space is now and the fact that the basic looking unit is now personalized. I also love the price of the final product.
I am currently looking at ways to turn the old four cube unit into a media console!