2 Wooden Jewelry Organizers that will Help Tame Clutter
Jewelry is one of those items that always seems to be able to creep in and cutter up your surfaces. It needs a bit of wrangling in order to keep it organized. Here are two DIY wooden jewelry organizers that do just that.
A little while back, I did an oyster shell trinket tray DIY that came out so pretty. I was so pleased with it that I now have several around the house. I decided I needed a few more organizers that could hold bigger pieces. These two wooden jewelry organizers were inexpensive and, they work perfectly for my organizational needs.
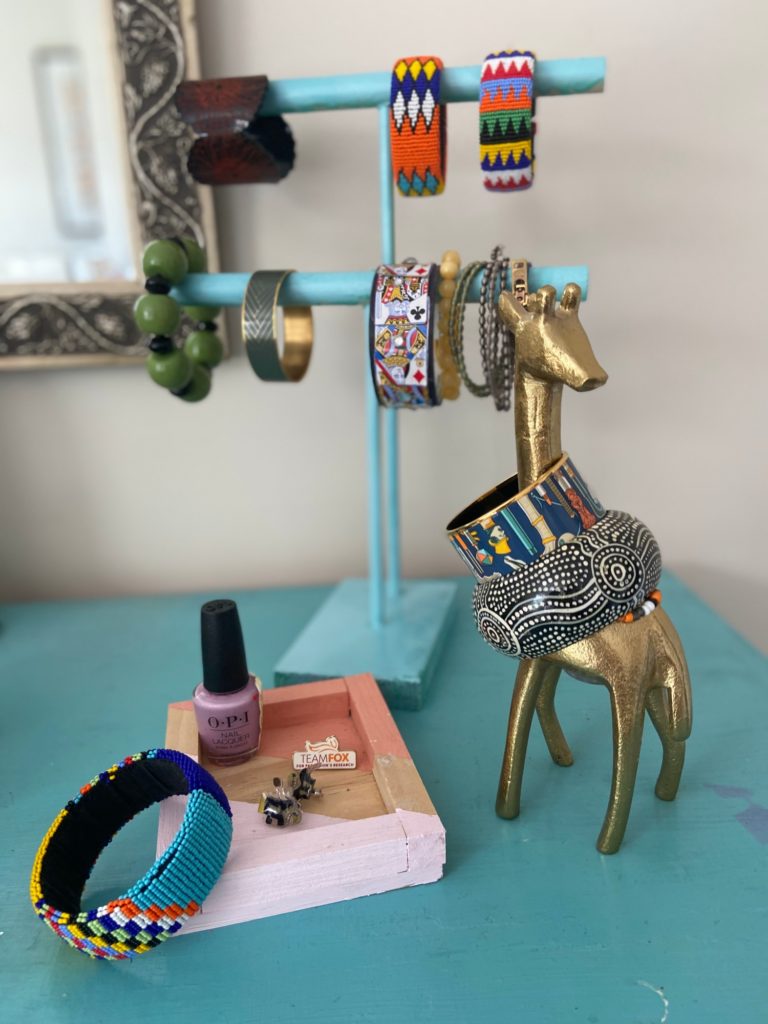
The tall dowel wooden jewelry organizer holds a ton of bracelets and looks nice enough to keep on display. The color block trinket tray can hold cufflinks, earrings, or anything else that needs a bit of organizing. You can customize the tray to be any size so it’s great for tabletop organization or, it can also be utilized as custom drawer inserts for your vanity or bedside table.
Color blocked Wooden Tray

What You’ll Need:
- Square wooden dowel
- Small wooden board
- Wood glue
- Clamp
- Craft Paint
- Painters tape

The great thing about this DIY is that you can customize the trays to whatever size you want. You can even make a few different sizes and have a set. I used a piece of scrap wood that was 4.5 x 5.5 inches.
Cut the wooden dowels using a saw so that it fits snuggly around the edges. Glue the dowels to the board and clamp them tightly. Allow the glue to dry according to the package directions.
When the tray is completely dry, use painters tape to mark the sections where you want the natural wood to show through. Using craft paint in two different colors, paint the rest of the tray. Allow the paint to dry and then remove the tape.
Now all that’s left to do it to fill it with rings, bracelets, make-up, or anything else that needs to be organized.
Wooden Jewelry Stand

What You’ll Need:
- Small wooden dowels
- Large wooden dowel
- Wood base
- Drill
- Wood glue
Cut the base of the jewelry stand to your desired size. Mine measures 6 inches x 3.5 inches.. With a pencil, mark where your dowels will go. They should be in the center of the board and at least 2 inches apart,
Use your drill to make two small holes where you made your marks. Keep drilling the hole slightly larger until the smaller dowels fit snugly inside.
Cut you larger dowels and mark the center of each one. Drill a hole about 1/2-3/4 of the way through the dowel making sure that he smaller dowel can fit inside.
Once everything fits tightly. Add a bit of wood glue to each hole and assemble the stand. Wait for the wood glue to dry completely and then add paint.