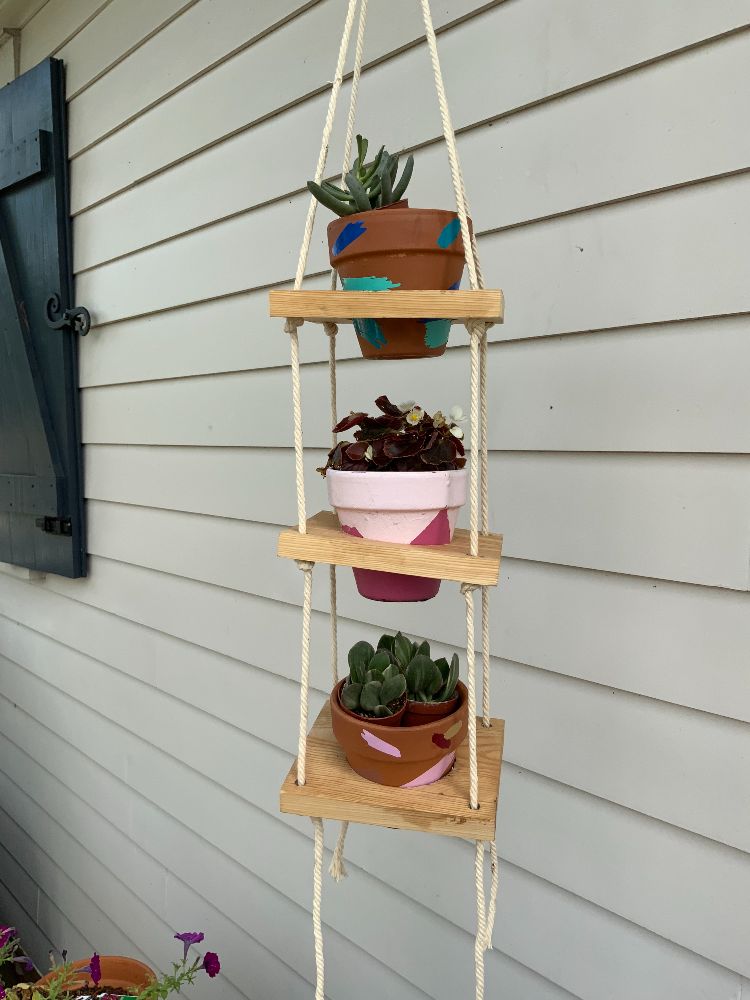
Make a Tiered Hanging Wood Planter
During the spring and summer months, my plant collection starts to get a little out of control. It seems like every time I go out, I just can’t resist bringing home a new succulent or colorful flower, The only problem with having a ton of plants is figuring out where to keep them all. This three-tiered hanging wood planter is the perfect space-saving solution. The vertical design makes it possible to display multiple plants in a small space and, it looks great indoors or outdoors.
What You’ll Need:
- Pre-cut wood or
- A saw (this miter saw is my go-to favorite for woodworking projects. It’s also a low price so it’s great for beginners.) a jigsaw also does the trick.
- Drill
- Hole saw drill attachments
- rope (go with classic white or add a pop of color)
- Planters
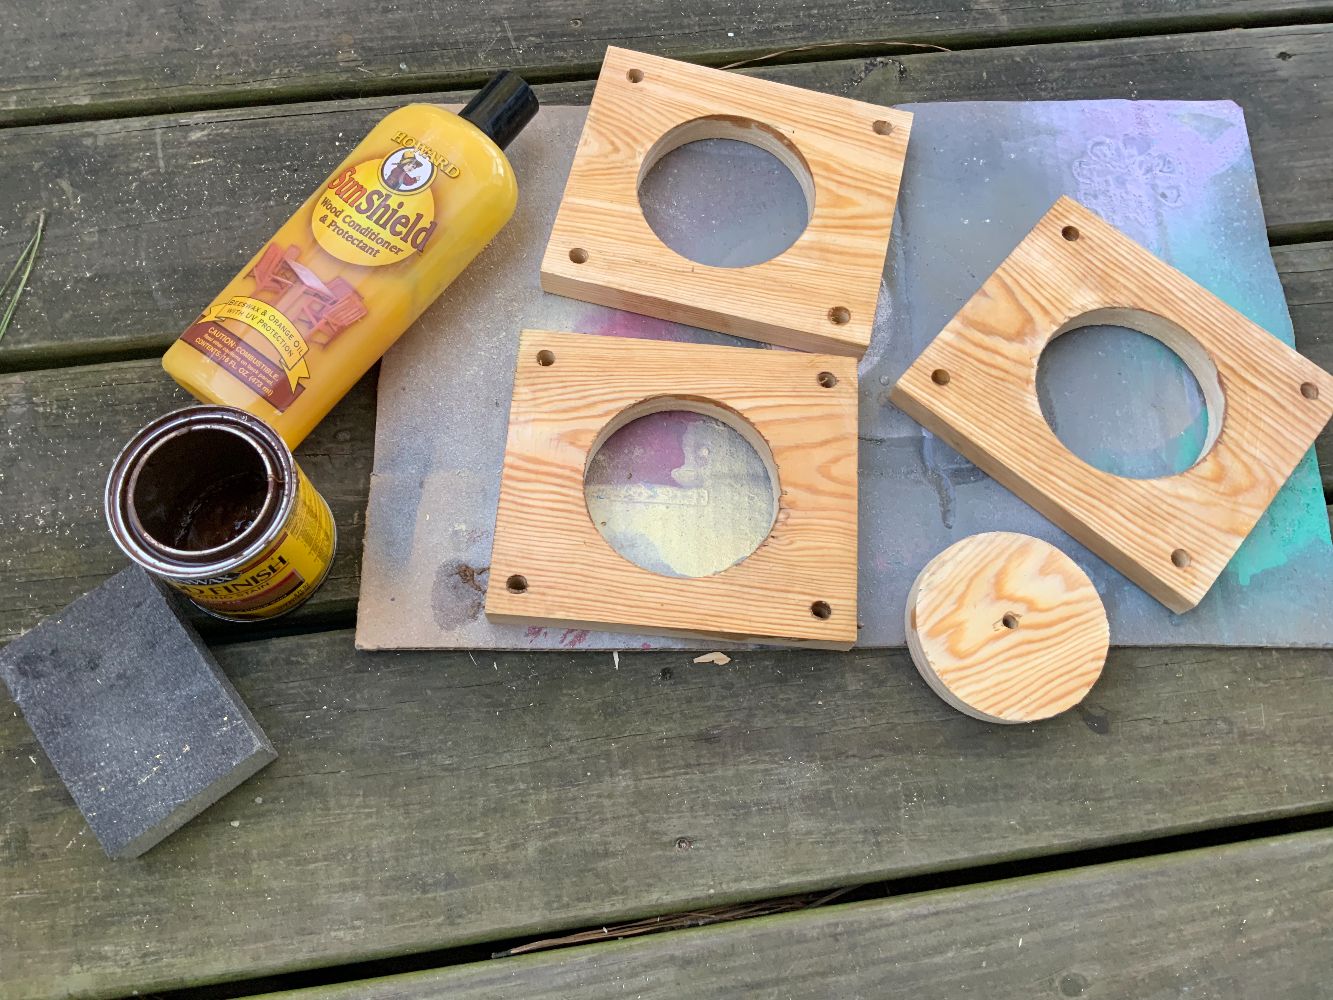
- Wood stain or paint
- Wood conditioner
- sandpaper
- 2″ metal ring
Prep: Tiered Hanging Wood Planter
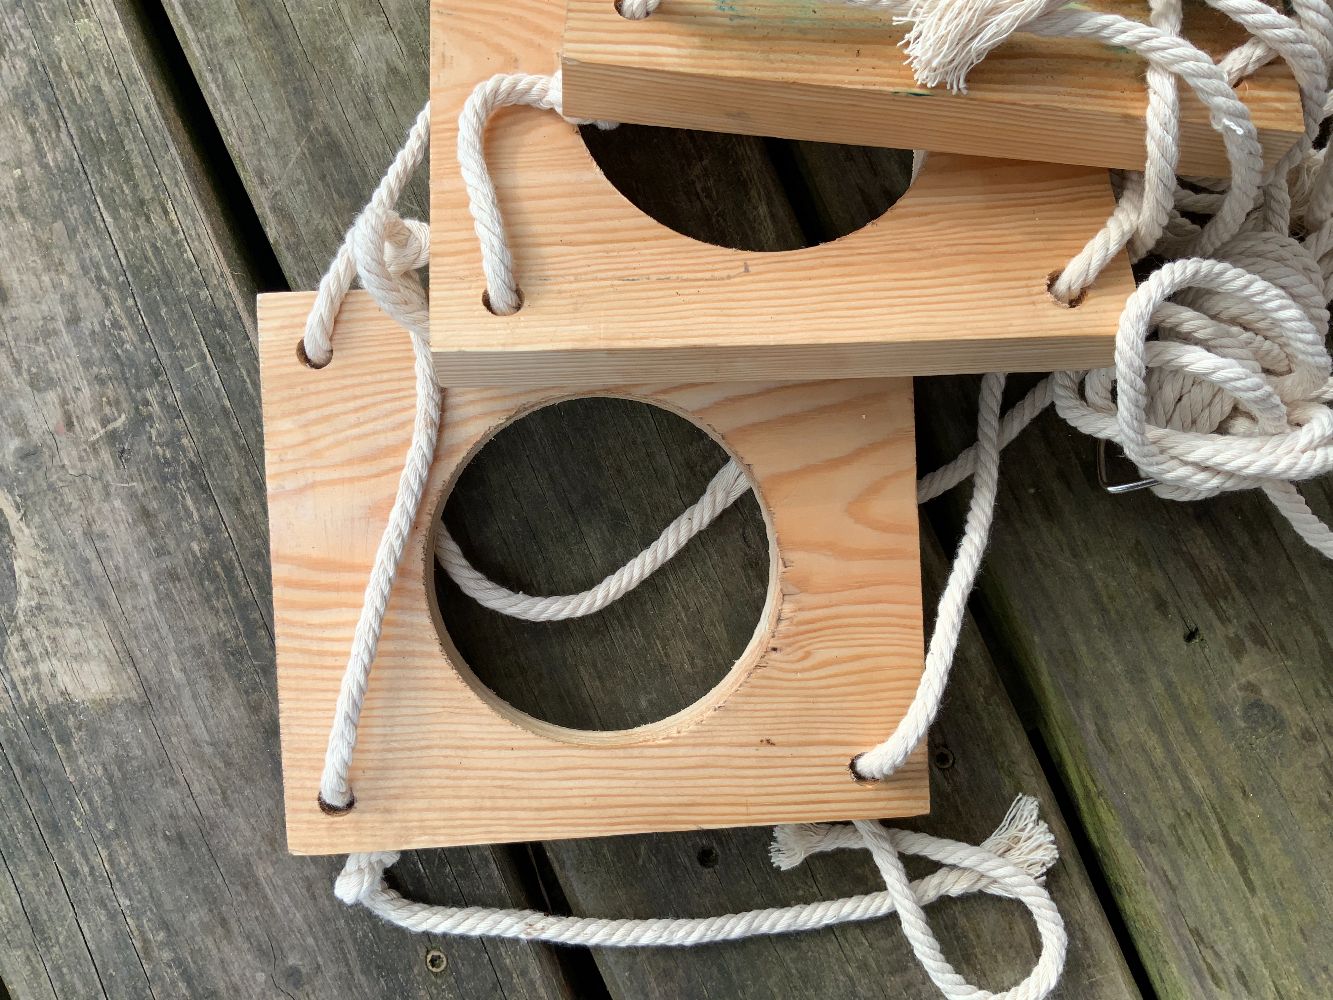
Start by cutting your wood into three equal-sized squares. The squares should be at least an inch wider than the widest part of your planter. My squares are each 5 1/2 by 6 1/2.
Next, choose a circular hole saw drill bit that is wider than the bottom of your planter but, smaller than the top part of the planter so that your planter will balance within the holder. I used a hole saw that had a 3 1/2 inch diameter. Mark the center of each piece of wood, line up the drill bit to that center point, and drill a hole through each wood piece.
Next, change out your drill bit so that you can drill holes in the corner of each square 1/2″ in from each side. The holes should be just slightly larger than the width of your rope.
Sand down any rough edges of your wooden squares. Stain or paint your wood the color of your choosing and allow it to dry completely. Apply wood conditioner to protect your wood and add shine.
Once the wood is completely dry, measure the amount of space you will need in between your planters. Mine are about 8″ apart, but this will vary depending on the type of plants you’re using.
Cut four lengths of rope and tie them all together in a knot about 6″from the top. Use the knot to tie in and secure the metal ring for hanging. Make sure your rope is long enough to pass through all three wooden squares with enough leftover to hang from the height of your ceiling.
Assemble: Tiered Hanging Wood Planter
Hang the ring in an open area and thread each piece of rope through the 4 corners of your first square. Tie a knot on the underside of each corner to keep the wooden square from sliding down the rope. Check to make sure the wood is level, adjusting the knots up or down as needed. Work your way down, repeating this process with the remaining two squares. Keep your spacing in mind. Once all pieces are secure, cut off the excess rope with scissors.
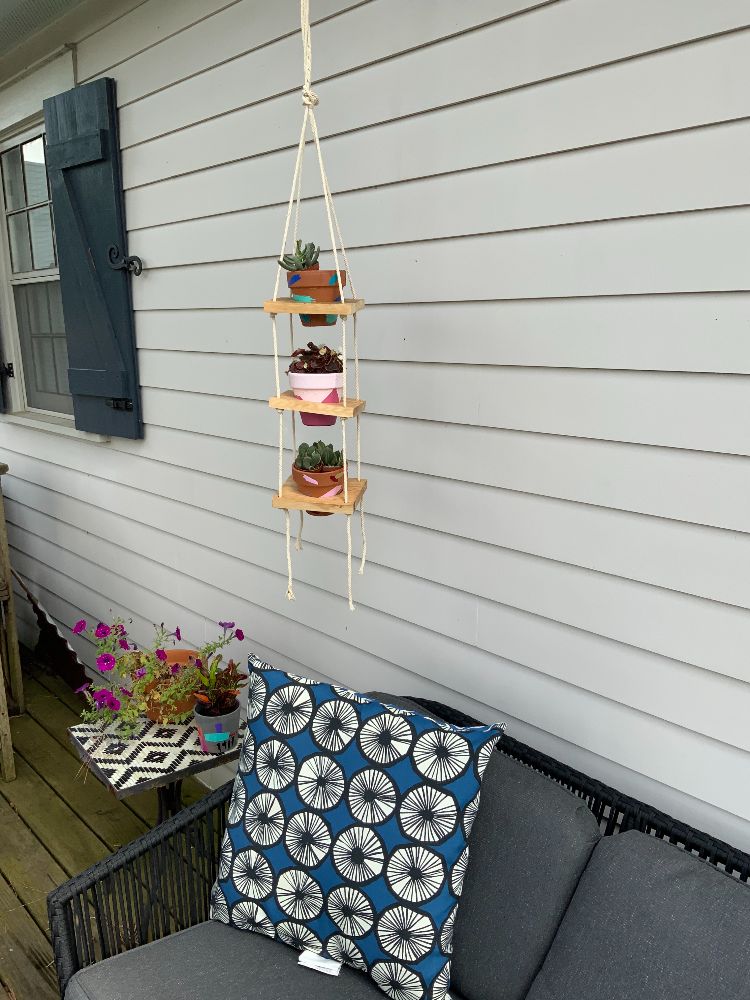
Now all you have to do is add plants and find a sunny spot to hang your new planter.
Looking for ways to brighten up your planters? Try this cute face planter or this simple and chic patterned planter.